A neat, logical helm layout makes a big difference when trying to operate your boat, particularly when the sun starts to set and you head home. And a clear and well-labelled switch panel is a vital part of that layout. By Norman Holtzhausen.
For most boaties, getting close and personal with a switch panel only happens when something stops working. Finding the problem can dissolve marriages. Especially with a critical item like the toilet macerator pump! Has the motor jammed, has the fuse blown, or is it simply a dodgy connection? Answering those imponderables is much easier if you have a good switch panel.
For decades a vessel’s standard switch panel was configured around every device having its own fuse, usually an in-line fuse holder hidden in the back. Any issue that caused the device to draw more current than it should resulted in a blown fuse.

While annoying, this was preferable to the wire over-heating and causing more serious damage or even a fire. But the location of these fuses made troubleshooting a nightmare.
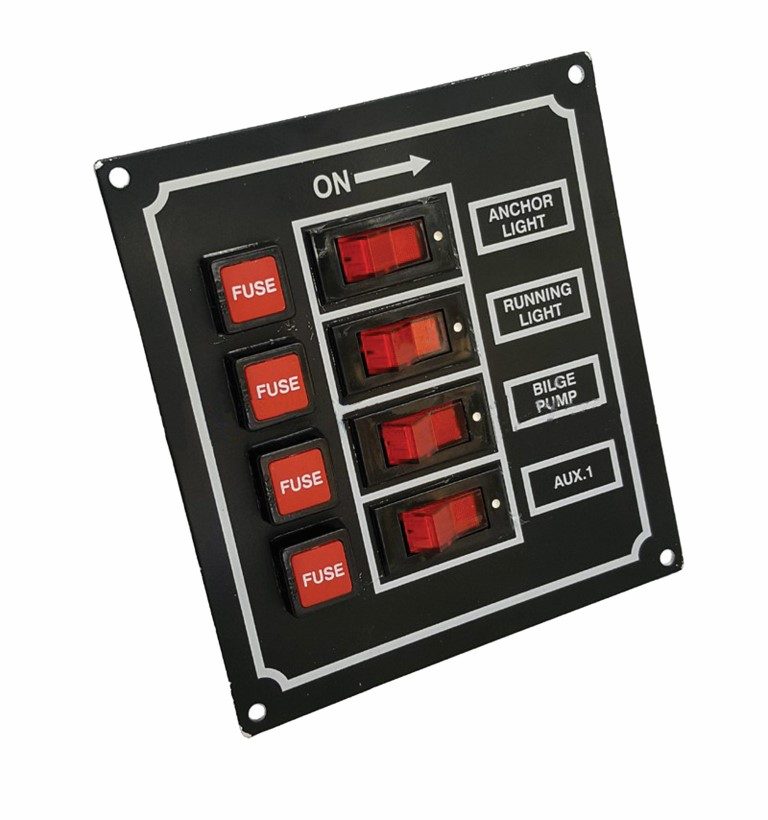
Happily, things evolved and switch panels with front access fuses appeared, making it a 30-second job to remove the fuse and check its status. The fix was just a matter of swapping the blown culprit with a spare (you do carry spares on board, don’t you?) and hoping that the problem wasn’t more serious. A serious problem promptly caused the replacement fuse to blow.
Many older boats still carry this sort of configuration, and fused switch panels can still be purchased from some retailers.
CIRCUIT BREAKERS

But technology has moved on and today most switch panels have circuit-breakers rather than fuses. These act in a similar way, cutting the flow of power if too much current is drawn, such as would happen if there was a short-circuit.
Rather than permanently burning out the wire inside the fuse though, the circuit breaker flips off, cutting power. It’s immediately obvious which circuit has tripped, and resetting it is a matter of flipping the switch back or pushing the reset button.
And let’s be clear – sometimes it’s just a temporary issue. For example, a toilet pump that has a heavier than normal load to deal with can exceed the usual current draw for a few seconds. Older incandescent light bulbs typically draw a slightly higher current for a fraction of a second when first turned on, and other marine electronics can also exceed their rated current draw for a very short period. So tripped circuits are by no means unusual.
With a more serious problem the breaker will quickly trip again, telling you that further investigation is required. This breaker system also removes the temptation to solve a repeatedly-blowing fuse problem by fitting a higher-capacity fuse, rather than properly investigating the cause.

Replacing an old switch panel is a fiddly but not terribly complex job. The first step is sourcing a replacement unit, either with the same number of switches or with additional options for new accessories.
Luckily the circuit breakers are now very compact, so you may find you can get more switches into a space that’s the same or even smaller than your original panel. You also need to check the rating of the circuit breakers, since many panels come with a couple of higher-current breakers for heavier loads, and a lower rating for lighter loads.
Make sure the new panel fits into the dashboard, not only in width and height but also the depth it requires behind the panel. Circuit breaker panels may be somewhat deeper than the previous switch-and-fuse panel. If it’s larger than your original, check that there’s space to modify the opening to match the new unit before buying it.
A panel that’s smaller than the original cut-out is more of a mission – you’ll need to make a blanking plate to cover the old opening and cut a smaller hole into it for the new unit. Typically this isn’t as neat an outcome, so you might be better off buying a larger panel even if you will (initially) have some unused switches. These will no doubt get allocated over time.
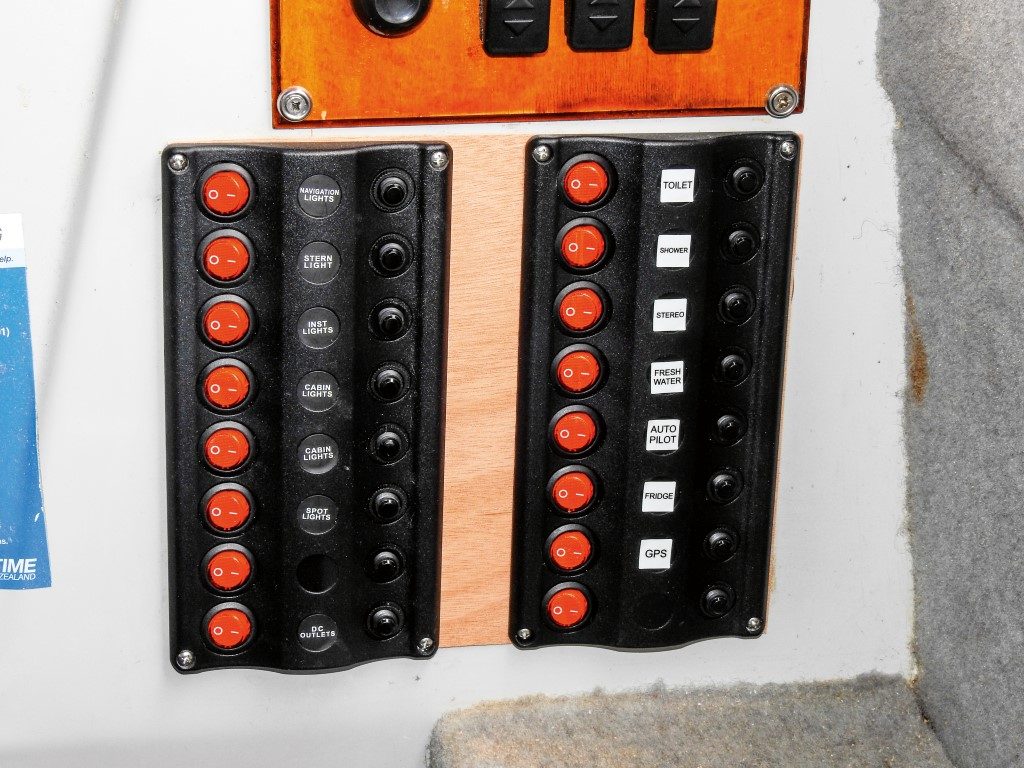
Our project boat had a double panel of circuit breakers and it had two problems: the switches weren’t back-lit, making them very hard to read in the dark. Secondly, the toggle part of two of the switches had broken off and as an obsolete model, spares weren’t available. Time for an upgrade.
The local chandler presented replacement panels which were almost exactly the same size as the original. They have smart back-lit rocker switches, with pop-out circuit breakers next to each switch. It seemed this would be an easy replacement.
INSTALLATION
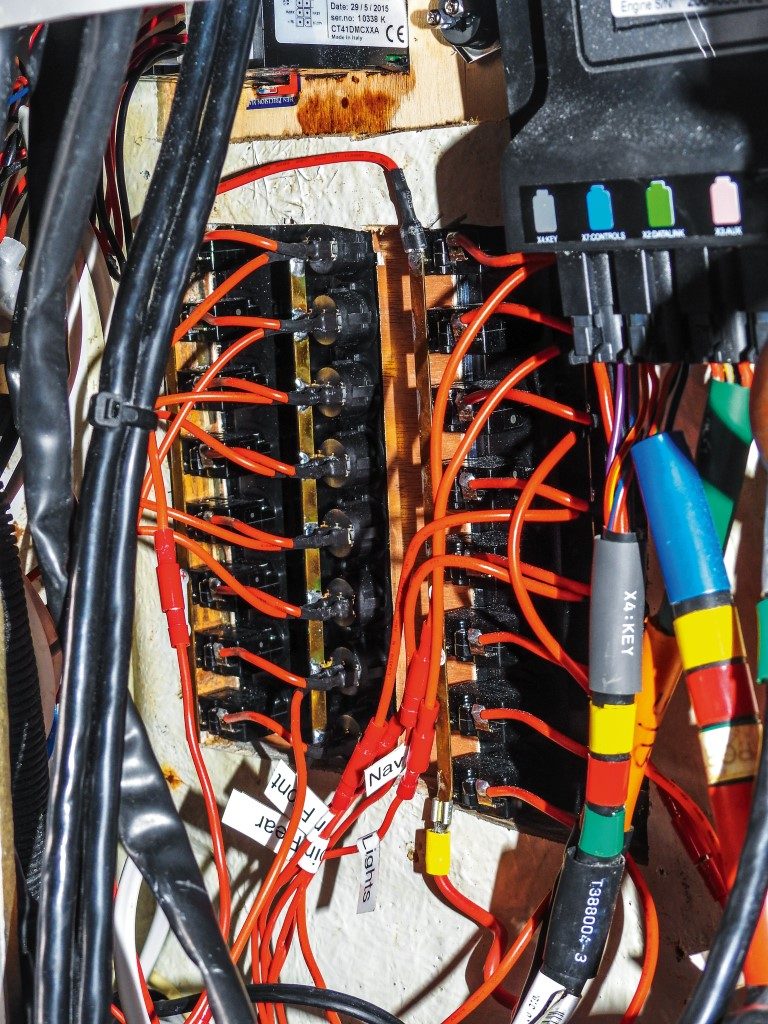
After unscrewing the old panels and carefully pulling them forward, we clearly labelled all the wires as they were removed from the old switches. I have a small label printer which is perfect for this, but masking tape and a sharpie work just as well.
To make the job easier make sure the wires are long enough to easily connect to the new panel. In our case two wires were very short, so we crimped on an extension to each before labelling them.
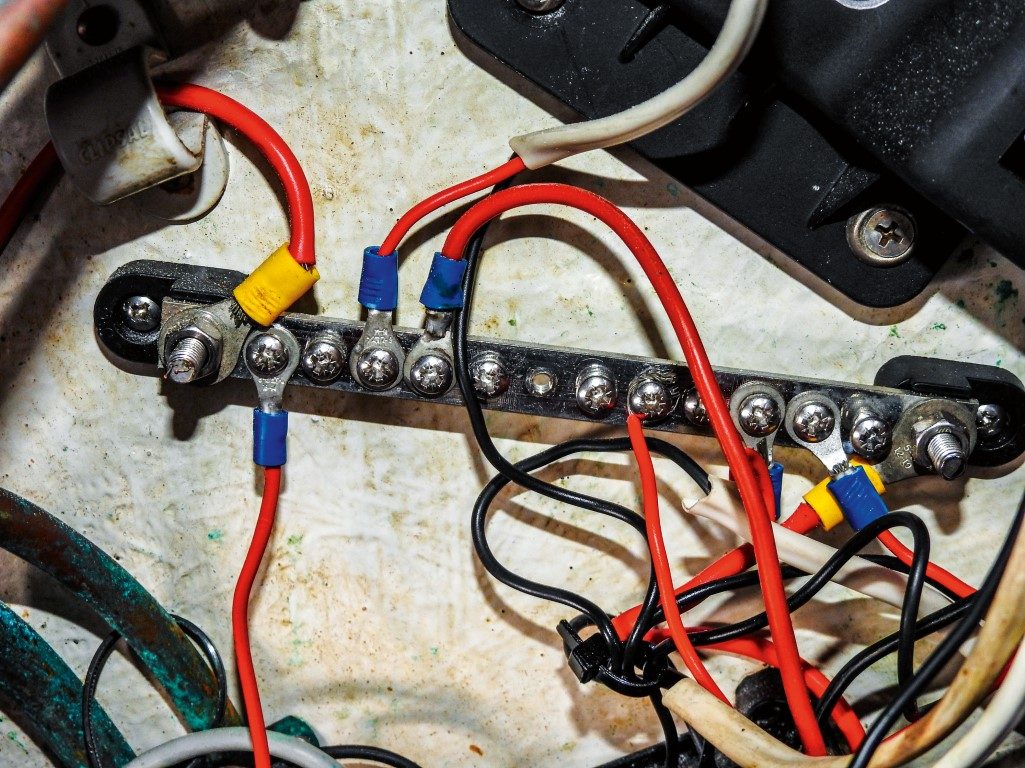
While you have access to the wiring, use the opportunity to neaten things up a bit and check for any redundant wiring. In our case, every switch on the previous setup had two wires – one from the positive bus bar to the switch, and one from the switch to the accessory.
The new switch panel has its own integrated bus bar as part of the panel, so the eight individual feeds were replaced by a single chunky one between the two bus bars. We also found a couple of unconnected wires and after confirming they were no longer active we completely removed them.
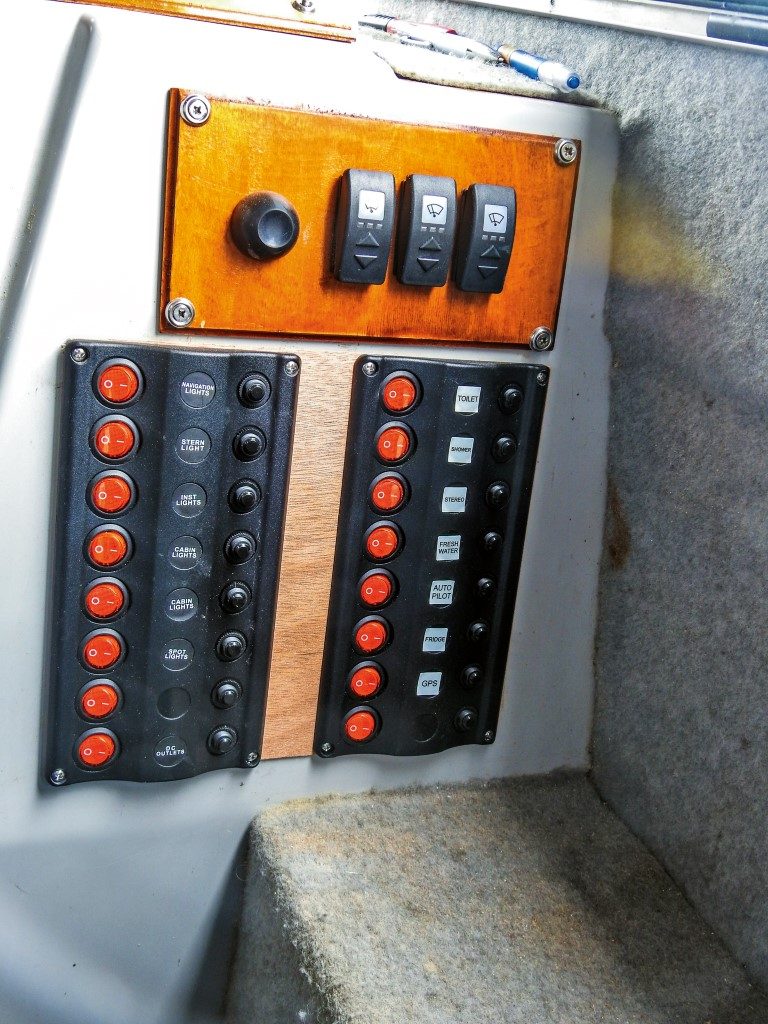
With the old panel disconnected, test-fit the new one. In our case, although the new panels were the same size, we had two panels sitting side by side and there would be an unsightly gap between them. So we cut a piece of thin ply to fit behind the panels to close this up. This isn’t visible except in the narrow gap, but leaves the entire panel slightly ‘proud’ of the dash.
The new panel also used spade lugs rather than screwdown terminals, so we crimped connectors on to each wire. We checked which items required higher current (toilet macerator pump and auto-helm, for example) and connected these to the correctly-rated circuit breakers. As we connected things up, we applied the appropriate labels to the front of the panel.
And here is where things got a little complex.
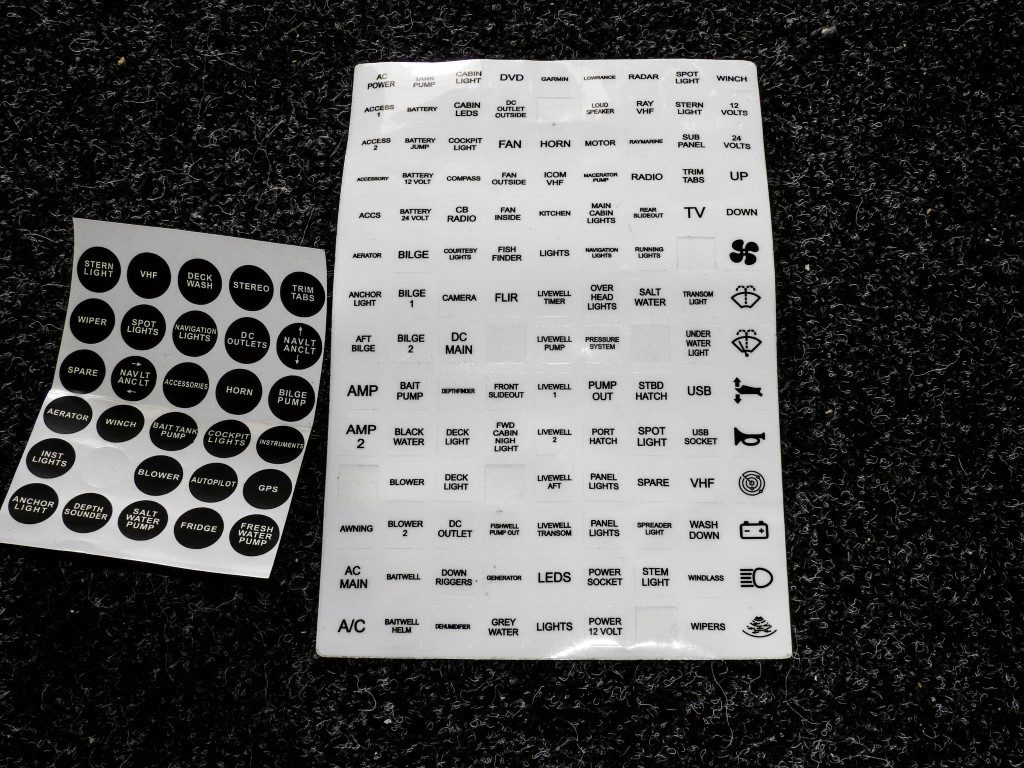
All switch panels come with a bunch of pre-printed labels reflecting the most common accessories. Additional sets of labels are readily available with different pictures or words. Or, you can use a labelmaker to make your own labels.
But the switch panel we had purchased required circular labels – and the supplied set was missing a couple of key items, including ‘Toilet’. We were unable to find matching circular versions. The best we could do was a set of square labels. This is adequate but not as neat as we would have liked.
Still, the completed panel is easy to read, and I have shuffled the layout around, positioning the most commonly-used switches at the top of the panel. Apart from a slight dissatisfaction with the square labels all looks good.
The total job cost around $300 for the two panels (I had sufficient crimps in my toolbox) and took an afternoon to complete. A very worthwhile upgrade!